Manually configure WPA2-Enterprise for your wireless network profile in Windows Vista and Windows 7. Follow the steps below to configure WPA2-Enterprise.
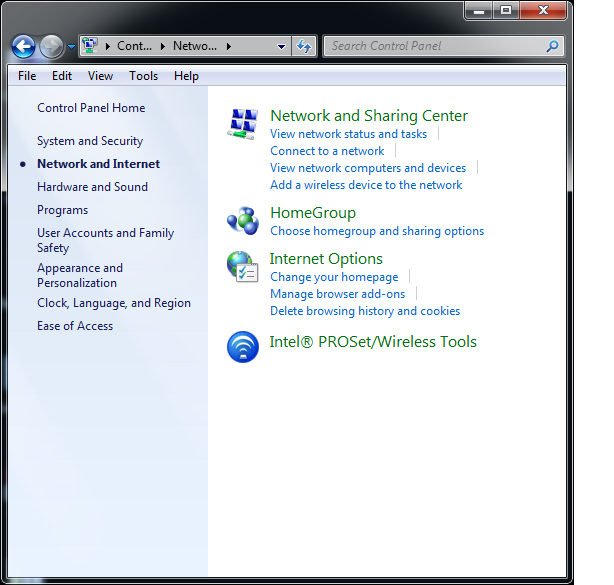
Press the Windows Key, type Control Panel and press Enter.
Click Network and Internet

Click Network and Sharing Center.
Click Manage wireless network on the left site.

In the Network window, click Add.
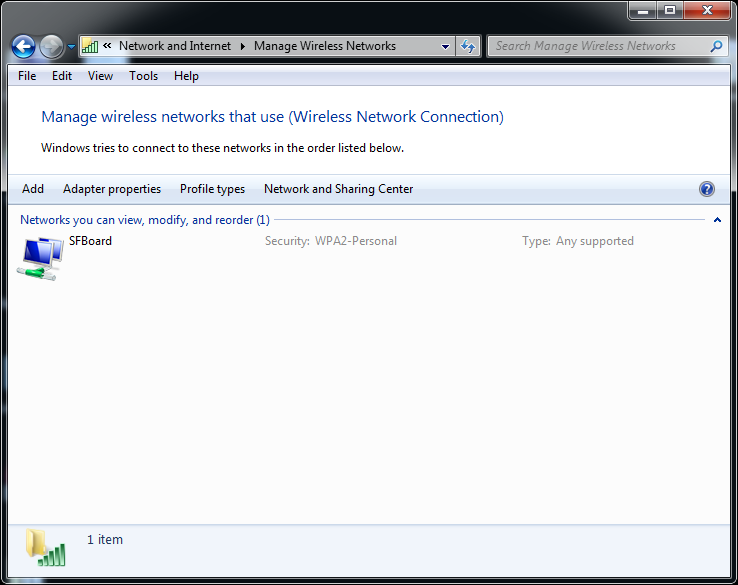
Click Manually create a network profile.

Enter the following:
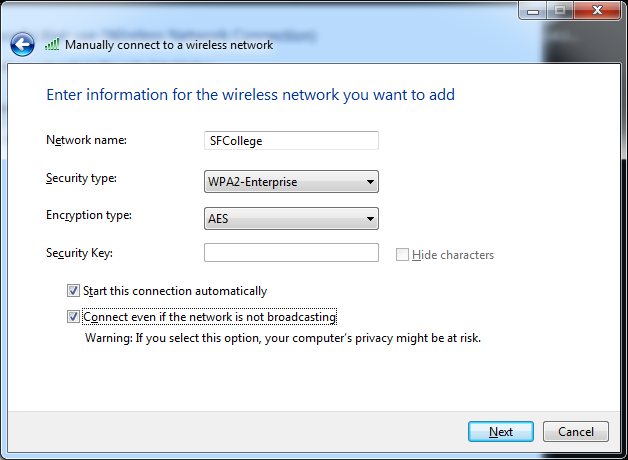
Click Next.
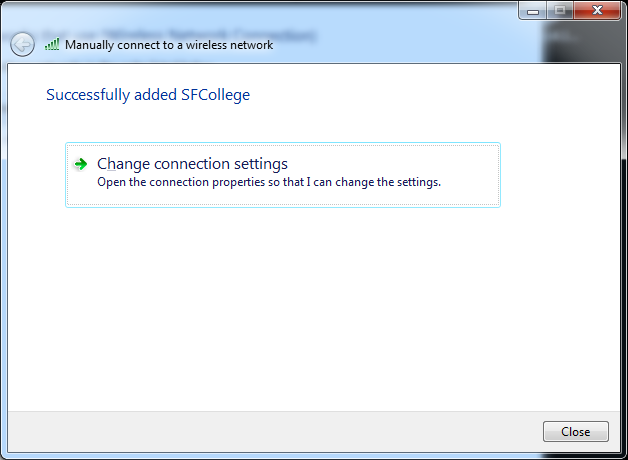
Click Change connection settings
Choose the Security tab.
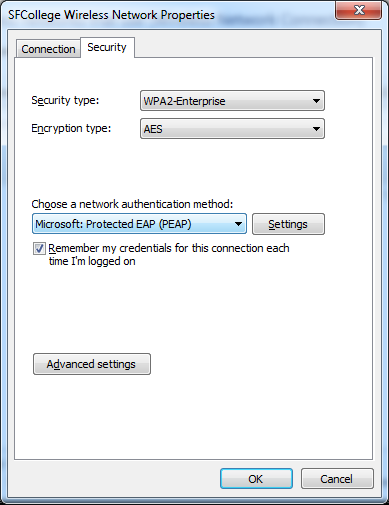
Click Setting button.
Uncheck Validate server certificate.
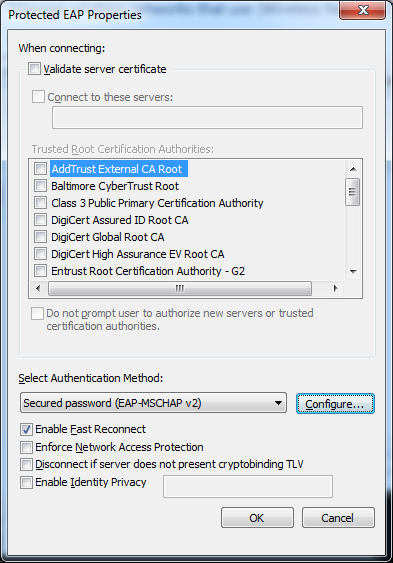
Authentication Method must be EAP-MSCHAP v2. Click Configure button.
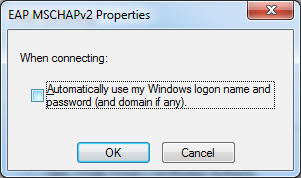
Uncheck Automatically use my Windows logon on name and password if the computer is not on the domain.
Click OK. Click OK.
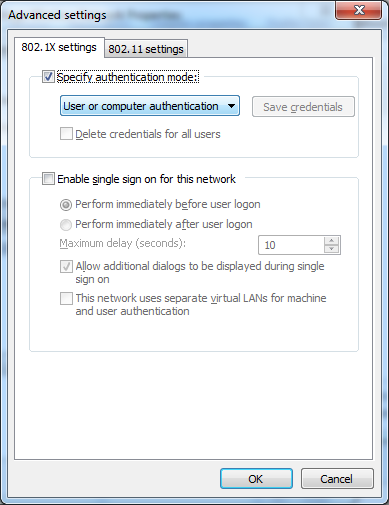
You should see the "SFCollege Wireless Network Properties" window, click the Advanced Settings Button. On the 802.1X settings tab. Check Specify authentication mode. Choose User or computer authentication.
Click OK. Click OK. Click Close.
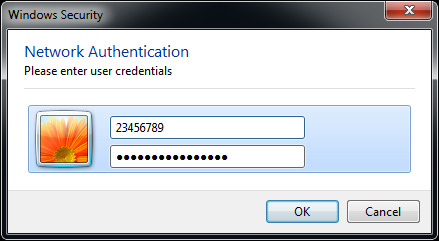
First Time you use SFCollege WiFi network you will be asked for your credentials. Use your SF ID (8 digit numbers) and password